
Creating an IoT Scrolling Marquee with Slack and Particle
A few weeks back I was thinking about how I could integrate IoT into my team environment.
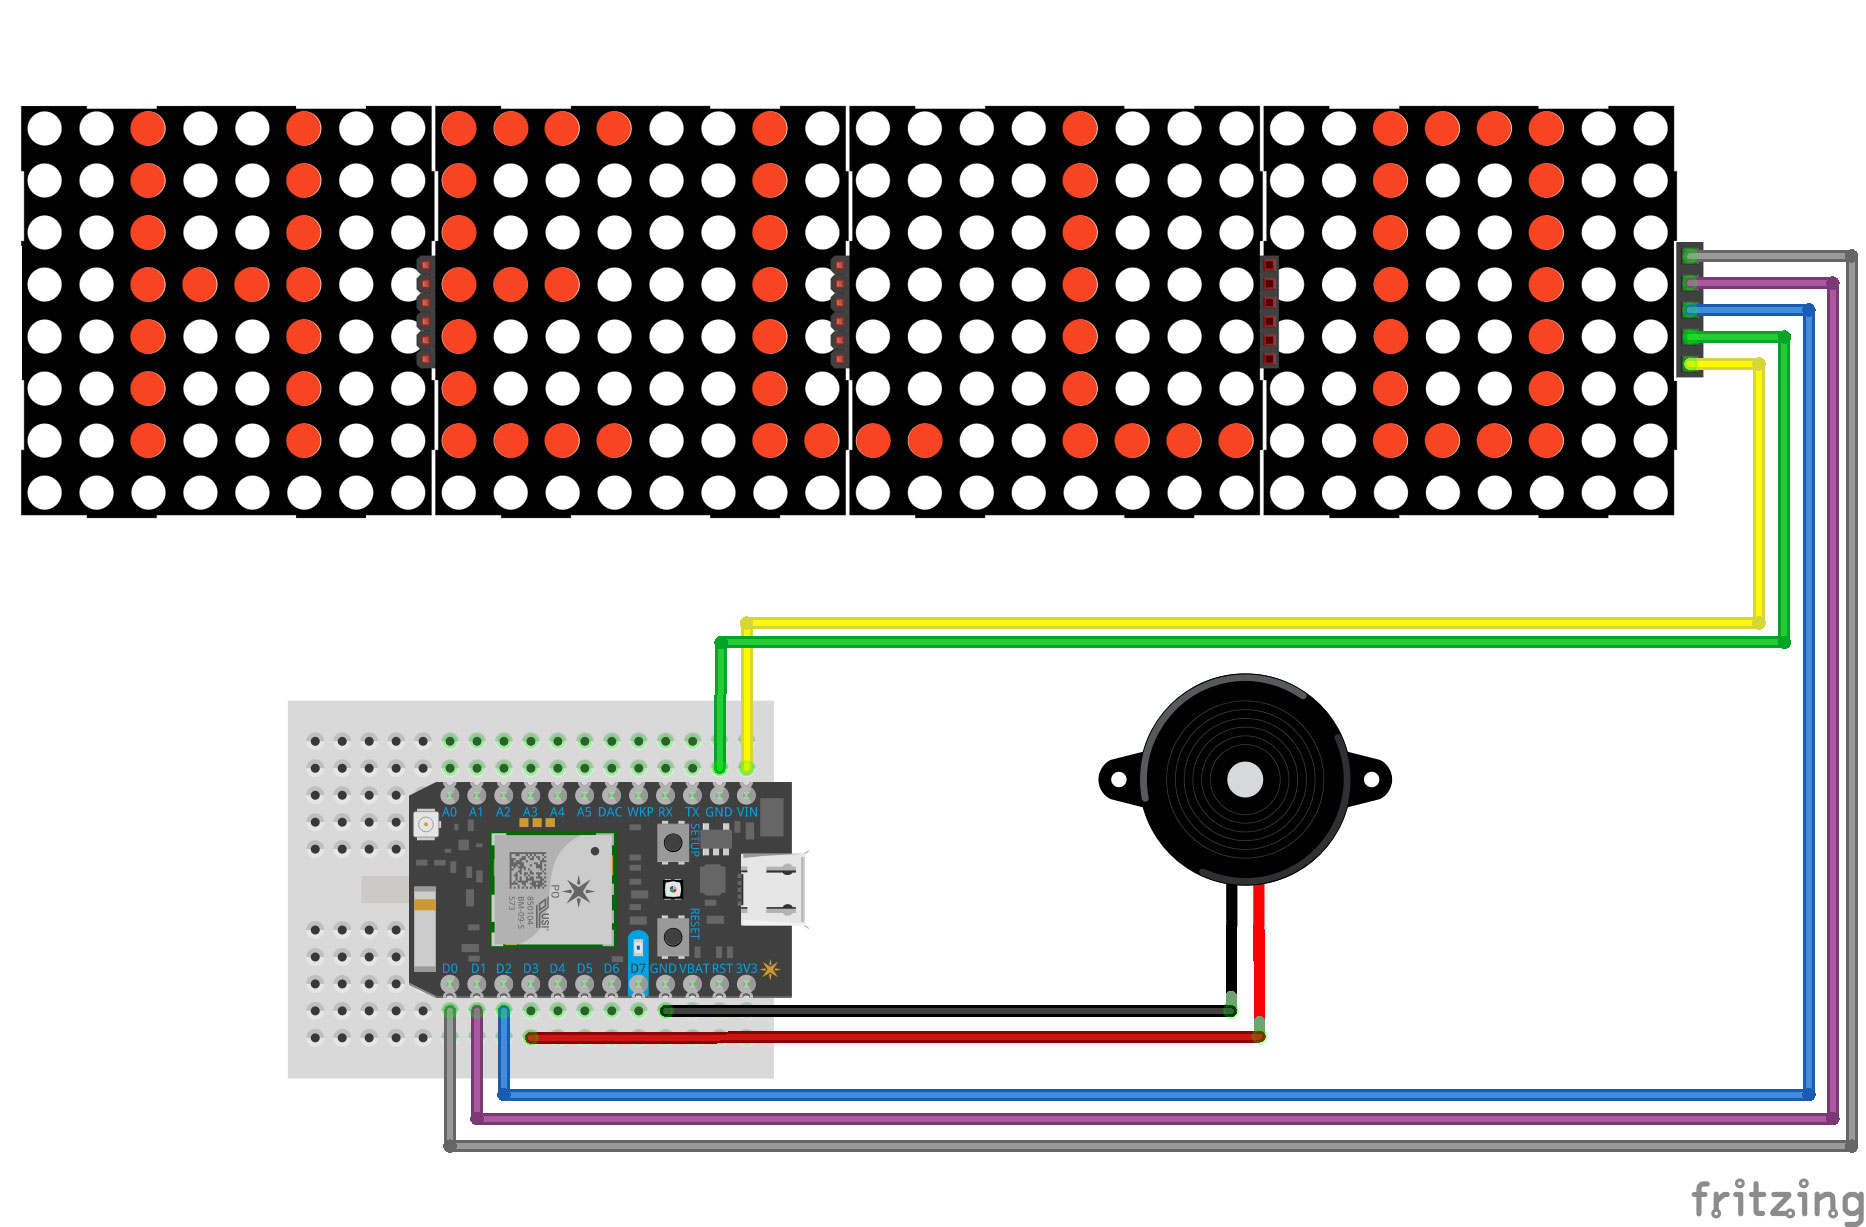
I’ve been a tinkerer with Particle products, on and off, for a couple of years now. So when I saw this Hackster tutorial Smart LED Matrix for Particle Photon, I thought it would be sweet to display something like this in the office and have anyone in our team send it unique messages from a UI - regardless if theyre in the office or not.
Want to see the end product? Skip to the conclusion
User Interface
As we use Slack as the main tool for communication in our team, this seemed like the most suitable UI that would require the least amount of time investment. Slack allows you to create custom slash commands, that when actioned can hit a API endpoint and POST or GET data.
This sounds like the perfect UI option!
API
Next, I set out on creating a simple expressJS API.
The API serves as a way of providing custom endpoints for our Slack slash commands.
Each endpoint accepts text in the request body, and will log into a Particle device (Photon in this example) and send it a payload.
I created 2 POST endpoints, /display and /hr.
The /display endpoint just passes the full text payload through to the device.
The /hr endpoints prefixes text with Go to HR, {text}, and then passes that though the device.
app.post('/api/display', async (req, res, next) => {
  // abstract props from the request body
  const { token, text } = req.body

  // Have we already logged in?
  // if not, log in
  if (!auth) {
    await Particle.login({username, password})
      .then(data => {
        auth = data.body.access_token
      })
      .catch(({ status, message }) =>
        res.status(status).send({ error: message })
      )
  }

  // A tiny layer of security
  // Let's check that the our slash command token
  // matches our env variable
  if (!token || token !== displayKey) {
    return res.status(401).send({ error: '401 Unauthorized' })
  }

  // call the 'matrix_display_message' function on
  // our device and pass it 'text'
  await Particle.callFunction({
    deviceId,
    name: 'matrix_display_message',
    argument: text,
    auth
  })
  .then((data) => res.send(`Now displaying: ${data.body}`))
  .catch((err) => console.error(err))

  next()
})
You can see the example source code (index.js) here.
NOTE: Keep your secrets safe!
This example references environment variables for your Particle account and device credentials, as well as slash command tokens.
I you wish to use this api locally, you should create an .env file and include your secret credentials.
PDEVICE=particle_device_id
PUSER=particle_user
PPASS=particle_password
HRKEY=slack_hr_slash_command_id # see next step
DISPLAYKEY=slack_display_slash_command_id # see next step
Slash commands
Once the API was set up, I needed to create the slash commands in the Slack app.Administrations > Manage apps > custom-integrations.
Command: /hr
URL: path_to_your_server/api/hr
Token: Take note of this value and store it in your .env file
Command: /display
URL: path_to_your_server/api/display
Token: Take note of this value and store it in your .env fileOnce created, you should be able to use the slash commands like so:
/hr Pete

Pete is required by HR.

/display Where are we going for lunch today?

Now displaying: Where are we going for lunch today?
Device
The device needs to be flashed with code to include our matrix_display_message function, as defined in our API route.
Code can be flashed using _Particle_’s Web IDE or using their sweet vscode extension Workbench.
You can see the example source code (slack-iot-marquee.ino) here.
I sourced all hardware and components for this example, from Core Electronics
Deploying the API
I chose to host my API with now.
You do not need to use now, but I have included and example now.json manifest in my source, if you wish to do so.
The manifest exposes the 2 available routes of the api (/hr and /display), and also references the same secret variable values as listed in the following .env file.
Note: you will need a way to provide your hosted API access to your secret credentials.
Luckily with _now_, thjis is simple:
> now secret add slack-display-user foo@bar.comConclusion
Once the API was deployed, devices flashed, custom slash commands integrated, and annoying peizo connected, our team had our own IoT Scrolling Marquee that could be accessed anywhere and anytime!